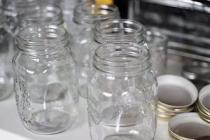
In our country it is quite difficult to meet a family who has never prepared for the winter. Canning itself is a rather labor-intensive process, but for some reason the thermal preparation of the container usually causes the most trouble. And if previously the entire procedure took a lot of time and effort, then the ability to sterilize jars in the microwave has greatly facilitated this work.
The need to sterilize jars
 The importance of this procedure is explained primarily by the need to disinfect the container. Even if it is washed well, this does not mean that all the micro- and macroorganisms in it have died. And although they themselves are harmless, their waste products are toxic to humans and can lead to poisoning. The greatest health hazard is botulinum toxin, which is produced by bacteria in an airless space.
In addition, clostridia live in soil and water, which is the cause of botulism. If you use drinking water of poor quality or take an unscrupulous approach to sterilizing containers, the risk of contracting this disease increases.
Advantages and disadvantages of the method
Fortunately for modern housewives, technology is developing at a rapid pace, making long and monotonous work much easier. However, microwave sterilization has both its pros and cons. The advantages of this method include:
- significant time savings;
- the ability to process several containers at once if they are small in size;
- maintaining a pleasant indoor microclimate due to the lack of humidity, which increases during sterilization using the traditional method;
- double impact on harmful microorganisms due to simultaneous treatment with steam and microwave waves.
This processing method is not without its drawbacks.. It can only be used for glass containers. Metal lids will have to be sterilized separately. The volume of sterilized jars cannot exceed 3 liters. Additional energy costs may also arise during operation.
Preparing containers
Before you figure out how to sterilize jars in the microwave, you need to properly prepare them. This is done in the same way, regardless of the method used to sterilize the container. Here is an approximate sequence of actions:

Steam disinfection
The essence of this method is that liquid is poured into a prepared glass container. When heated, it becomes steam, which is used to treat the walls of the dishes. The same principle is used, for example, to sterilize the spout of a kettle. Recommendations for the procedure:

Dry method
A special feature of this method is the fact that the container does not come into direct contact with water. At the same time, it is simultaneously exposed to a double effect: steam and microwave rays. It is performed as follows:
- Place a glass of filtered water in the center of the microwave. Do not fill it to the brim, otherwise it will splash out onto the turntable when it boils.
- Place the jars around the glass and turn on the oven for about five minutes. The power should be approximately 750 watts.
- After the containers are sterilized, they must be removed with dry oven mitts and placed on a clean towel. Remember to ensure that there is no sudden temperature change.
Handling filled dishes
In a microwave oven, you can process not only empty cans, but also those already filled with blanks. It doesn’t matter what it is: pickled mushrooms, salads, compotes or pickled cucumbers. Since heat treatment does not require much time, the finished product will not lose its qualities:

Now that you know how to sterilize jars in the microwave, both empty and filled, the canning process will no longer seem so long and monotonous, and your apartment will not resemble a steam room. If you correctly follow all safety precautions and follow all instructions exactly, then preparing containers for workpieces will not take much effort and time.
Sterilizing jars with blanks is a rather lengthy and not always the most pleasant process. It’s summer, it’s hot, there are a lot of cans, you want to do it quickly, you’re constantly looking - “it’s going to explode, it’s not going to explode.” But the family also distracts!
Therefore, it is worth taking a closer look at the proposed option, which should save time and nerves: sterilizing jars with blanks in a microwave oven.
There are two ways to sterilize jars in the microwave: with and without blanks. Let's look at both in order.
Microwave sterilization of jars
First, wash the jars thoroughly (you can use soda or soap, as you prefer). Then pour a little water into the bottom of the jars - about 1-2 cm. Turn on the microwave oven at a power of 700-800 W and set the jars to steam for 2-3 minutes. During this time, the water boils, and the steam sterilizes the jars. If you have a lot of jars, you can increase the sterilization time. It is better to sterilize the lids on the stove by immersing them in water.

We place three-liter jars (bottles, as they used to say) on their sides. Although they say that you don’t have to pour water at all (they say the jars are sterilized by radiation), it’s better not to risk it. We don't mind water!

We take out the cans very carefully so as not to get burned by the hot steam! Place it on a board, towel, or other stand. The jars are hot too!
We put as many jars as we can in the microwave. If there are a lot of them, increase the sterilization time to 5 minutes. If there are 2 or 3 cans, then two or three minutes will be enough.
Microwave sterilization of workpieces
We put the jars with the preparations inside the microwave, turn it on at full power and watch the process.

When the jars boil, switch the oven mode to minimum. After that, we wait another 2-3 minutes, after which we take out the jars and seal them with lids.

If you want the workpieces to be softer, sterilize longer - up to 5 minutes. The tomatoes will simply “melt”.
They rolled up the jars and wrapped them warmly, leaving them to cool.
Here is another interesting recipe on the same topic, from an old magazine.
Before placing vegetables or fruits, pour a little filling (marinade or syrup) into the prepared jars. In a liter jar - 3 spoons, in a half-liter jar - 2. Fill the jars with blanks and cover with glass lids.
We put it in the microwave, turn it on to maximum. The steam scalds the jar, heating the fruit, and microwave radiation completely sterilizes the contents.
We take out the jars, fill them with boiling liquid up to the level of the rim and immediately seal them.
Leave the jars to cool. In total, you can prepare up to 6-8 cans in 10 minutes. Place the sealed jars upside down on a dry towel and leave to cool.
A 0.75 liter jar takes 1.5 minutes. Three of these jars will take up to 4 minutes. After turning off the microwave oven, you need to wait up to half a minute so as not to get burned when removing the jars.
The methods were personally tested; not a single jar burst or exploded during the steaming process. Everything was prepared perfectly, which is what I wish for you too!

Sterilization of containers is an important stage in the process of canning homemade products. Do not place jars of jam, caviar or salads in dirty dishes. Otherwise, the massive development of bacteria begins, and all work is reduced to zero. To preserve the results from growing crops, it is necessary to properly prepare the container. A microwave oven, which is found in almost every home, will help you with this. Sterilization using this household appliance is similar to using an oven.
Advantages of sterilizing jars in the microwave
- processing 2-3 cans at the same time (volume up to 0.5 l.);
- in the room where the procedure is carried out, the air humidity and temperature do not increase;
- Sterilization using a microwave does not take much time.
Disadvantages of sterilizing jars in the microwave
- there is no possibility of processing containers with a volume of 4 liters or more;
- three-liter jars are sterilized one at a time and placed on their sides;
- high energy consumption.
Sterilizing jars in the microwave with steam
- Sort through the jars, eliminating specimens with chips and cracks. Otherwise, even a small defect will begin to crack when heated.
- Containers that have passed the selection must be washed thoroughly. To do this, use dish cleaning gel or baking soda. Wipe the cavity of the jars well with a sponge, then scald with boiling water.
- It is important to understand that even what you think are clean jars need to be washed with soda. The container has been left unused for a long time and contains bacteria.
- To begin sterilization, pour filtered water into each container. The liquid should fill the dish by 2-3 cm; this is the move that will allow you to create a steam bath.
- Do not fill jars with running water. During the sterilization process, the liquid will boil away, and a white (lime) coating will form on its walls, which will subsequently have to be removed.
- Next, place the containers in the microwave so that they do not come into contact with the walls of the device. Also, there should be no resistance to the rotating plate, otherwise the result will be incomplete.
- A modern microwave can hold 3-5 500 ml cans. If you are sterilizing a three-liter container, it also needs to be filled with water and placed on its side (lying position). At the same time, a soft towel folded in 2-3 layers is spread on the microwave plate.
- If we talk about the duration of the procedure, jars with a volume of 0.5-1 liters. simmer for 4 minutes (power - 1000 watts). When it is necessary to disinfect larger containers, set the power to 650 Watts for 7 minutes.
- As practice shows, time is selected through trial and error. We recommend playing it safe and sterilizing 1-2 minutes longer than indicated. The main condition is that the liquid must boil.
- After the procedure, remove the container using a dry oven mitt or thick towel. Do not use a wet cloth or the jars will burst. Pour out the remaining water, dry with sterile gauze, and immediately begin preserving caviar or jam.
- If you are sterilizing a large number of containers, after removing them from the microwave, place them on a cotton towel (be sure to be dry!). The container is kept upside down until conservation begins.
- Before filling sterilized jars, make sure that the temperature of the homemade preparations and the glass is approximately the same. Otherwise, you risk damaging the container due to a sudden change in mode.
- It is worth remembering that only glass containers are sterilized using the above method. We are not talking about tin lids, since according to the instructions for the device they cannot be placed in a microwave oven. The lids are processed using the classic method - boiling, the duration is a quarter of an hour.

- In some cases, it is necessary to obtain already dry jars after sterilization. If the processing is carried out using the above-mentioned technology, the jars are removed from the microwave oven wet, which is not always convenient.
- To make “dry” sterilization a reality, first sort out the containers. Exclude all copies with cracks and chips, otherwise they may burst during the heating process.
- Wash the jars with plenty of baking soda and scrub them thoroughly with a foam sponge. Rinse off the cleaning product and leave the container on the towel with the neck down. When the jars are dry, begin the procedure.
- Prepare a glass with a volume of 250-300 ml, fill it with filtered water, retreating 3-4 cm from the edges of the dish. There is no need to fill the glass completely; after boiling, the liquid will pour out onto the rotating plate.
- Place a container of water in the middle, and place jars of a suitable size around it. Set the processing time to 5 minutes, power to 750 Watts.
- After the timer goes off, carefully remove the dishes from the microwave using an oven mitt. Start preserving caviar or jam, most importantly, do not allow sudden temperature changes.
Sterilizing jam jars in the microwave
- Many housewives are wondering how to sterilize jars already filled with jam in the microwave. The procedure is not particularly difficult. Do not fill the container completely, step back 5 cm from the edges. Sterilization is also carried out without lids, this must be taken into account.
- Arrange the jars so that they do not touch each other. Set the power of the device to the maximum level, turn on the timer for 6 minutes. If you have a very powerful microwave oven, reduce the boiling time to 2 minutes.
- After completing the heat treatment, do not rush to open the appliance door. Leave the jam inside for 3-5 minutes; sterilization will continue throughout the specified period.
- Remove containers with treats using oven mitts or an oven mitt to prevent the jars from cracking due to temperature changes. After this, cool the product, roll up the sterilized lids using a special key.

- As with jam, jars filled with pickles or salads can be sterilized in the microwave. The main condition is to extract 2/3 of the composition from the total volume (later you will place the twist to the edges). Otherwise, when boiling, the composition will spill out of the container and stain the cavity of the household appliance.
- Place jars of suitable volume on a rotating plate; the containers should not touch each other. Set the timer for 3 minutes, boil at the maximum mark. When the procedure comes to an end, do not open the microwave for another 5 minutes.
- Next, grab the jars with a towel or glove and leave at room temperature until cool. At this time, sterilize and dry the tin lids by boiling. Fill the jars with pickles to the brim and roll them up with a kitchen wrench.
Sterilizing jars of fruits and berries in the microwave
- Housewives are interested in how exactly to sterilize containers with raw berries and fruits. The procedure is not particularly difficult, let’s consider it in order.
- First, prepare a syrup from filtered water and sugar. The amount of sweetener is added at your discretion, it all depends on individual preferences.
- Wash seasonal berries, do not peel them. Eliminate all rotten and dented specimens. Fill the jars with berries suitable for twisting, retreating 5 cm from the edges.
- Pour syrup over the fruits, set the device to maximum power, and turn on the timer for 5 minutes. In the case of very powerful microwave ovens, the duration of heat treatment is 2-3 minutes.
- If you wish, you can not completely fill the berries with syrup; add the composition after sterilization. This method is convenient for boiling black and red currants, gooseberries, raspberries, strawberries, cherries, cherries, wild strawberries, and lingonberries.
Microwave sterilization is gaining momentum, and this is not surprising. Thanks to the speed of the procedure, many housewives save time and effort. Consider steam or dry heat treatment technology. Sterilize jars with ready-made pickles, jam, and fresh seasonal berries.
Video: how to properly sterilize jars in the microwave
Preparing pickles and preserves for the winter is not an easy task, and every housewife knows: the key to making the preparations successful and the jars not to explode or become cloudy is thorough sterilization. Anyone who has ever sterilized jars in a pan of boiling water and a hot oven understands that this is a tedious task that threatens to cause burns. But there is a much simpler and more reliable method, and it will be useful for every lover of preparations to learn how to quickly sterilize jars in the microwave .
A microwave oven helps you simply complete a process that previously took a lot of time and effort, and disinfect the utensils needed for preparations in a few minutes. But the method also has a number of disadvantages that are worth mentioning.
Advantages of sterilization in the microwave:
- no need to boil a huge pot of water and arrange something like a steam bath in the kitchen;
- there is no danger of getting burned from hot steam or breaking the jar when removing it from boiling water; good dexterity is not required here, which not everyone has;
- sterilization is more effective due to exposure to microwave waves in addition to temperature.
Disadvantages of using a stove:
- sterilization in a microwave is an energy-intensive process, and the electricity bill will be very impressive;
- the lids will still have to be processed the old fashioned way, microwave waves are incompatible with metal objects;
- The volume of the oven allows you to place only one three-liter jar at a time, and you will have to repeat the procedure with each individual jar.
But, even given the limited volume, sterilization in the microwave will take much less time and effort than traditional methods.
Preparing empty glass jars
Before heating the jars, it is important to prepare them thoroughly. There are no trifles in the process, any flaw can ruin all the work, and it is very disappointing to find cloudy cucumbers or fermented jam, or, even worse, an exploding compote on your shelf.
Sequence of actions:
- first, inspect for damage, cracks and chips. Such defects will not allow the jar to be stored for a long time; pressure fluctuations occur under the influence of temperature changes and, if even a small crack occurs, the entire contents will disappear;
- secondly, rinse the jars well to remove all contaminants. It is better to use laundry soap and soda when washing; detergent residues may remain on the walls and affect the taste and quality of the pickles;
- thirdly, it is better to prepare the lids in advance, rinse, inspect and sterilize in boiling water.

Methods and step-by-step instructions for sterilization in an oven
There are two ways to sterilize jars in the microwave:
- with steam;
- dry, or more correctly called combined, since steam is still present.
Both methods are equally reliable, and you can choose the one that will be more convenient to use. Each housewife has her own favorite method, but it is also important to understand whether a dry jar is needed or whether it is acceptable to use a wet one.
Sterilize with steam
This is the simplest and most effective method:

- a small amount of water is poured into the jar, no more than two fingers from the bottom;
- the container is placed in the oven (if the jars are small, you can place several at once);
- In terms of time, the oven turns on for about 3 minutes, with a power of 800 watts, you can additionally navigate by the water level;
- three-liter jars can be folded on their side, after placing a clean towel or napkin so that the jars do not roll around during processing;
- The jars are removed from the oven, always with good oven mitts, excess water is poured out, and the jars are placed on a clean towel before pouring the preparations.
Important! Do not pour cold liquid into a hot jar.– the glass will probably crack due to a sharp temperature change. It is recommended to pour hot marinade into a warm container, and into a cooled one - already cooler.
It is better to take water without impurities to avoid scale formation at the bottom.

Dry sterilize
For this method, you will additionally need a glass; water is poured into it to 2/3 of the volume so that it does not spill when boiling. The jars and glass are placed in the microwave, and it is started at 700-800 watts. In order to correctly determine how many minutes it takes to process, you need to monitor the water level. After complete boiling, the treatment can be considered complete .
Microwave waves and hot steam will completely destroy bacteria on the surface of the container.
Features of microwave sterilization of preserved jars
Sometimes it is necessary to process the jars along with the blanks , so that the products themselves are also free from excess bacteria. In this case, we place the products prepared for preservation into clean containers and sterilize them in the same way, with the addition of a small amount of water.
Thanks to the short processing time, the products do not have time to cook, and the cucumbers will not lose their hardness and crunch, and the berries will retain their shape and texture.

With salty foods
Salt, in itself, is a disinfectant for preparations and preservation, but it always makes sense to further process containers and products for better protection.

This is especially important when it comes to meat products and mushrooms. Botulism is a terrible disease, sometimes fatal, and careful handling of food during preservation is extremely important.
Jars already filled with mushrooms or other preserves and a small container with water must be placed in the microwave, wait until the water boils, let it boil for about three minutes, after which they can be taken out, pour in the marinade, and quickly close with sterile lids using a seaming machine .
It is better to leave the finished jars to cool, wrapping them in a blanket so that the temperature drops more slowly. And leave it upside down for a couple of days to make sure there are no bubbles. If bubbles do appear, the jar will have to be reprocessed, sterilized and rolled up.
With raw berries and fruits
For raw fruits and berries, sterilization is also very important. All fruits contain bacteria that promote fermentation. And if you don’t want the jar to suddenly explode under the influence of accumulated gases, it must be thoroughly disinfected.

Here, after placing the fruit in the prepared jar and adding a little syrup, it is placed in the oven for a short time, allowed to boil for 3-5 minutes, taken out, filled with boiled syrup and sealed with a lid. It is important not to overexpose the fruit under the influence of temperature, otherwise they will lose their properties and will not look so beautiful.
With jam
Some housewives neglect the need to pasteurize jam, hoping that a large amount of sugar will not allow the product to spoil.
But it is worth remembering that jam very often begins to ferment or become moldy, which will be an extremely unpleasant surprise. Therefore, it is better to spend five minutes and avoid the disastrous consequences of a careless attitude.

Jars of jam are sterilized for 4-5 minutes at the usual power of 700-800 watts, after which you no longer have to worry about the state of your supplies all winter.
Important! When sterilizing, it is necessary to avoid getting contamination inside the container during the process of transferring and rolling up the cans.
If, however, through negligence, a foreign object gets into the jar, it will be easier to re-carry out the sterilization procedure than to wait for the inevitable spoilage of the products after some time.
Modern household appliances make the life of housewives much easier, and with minimal effort, excellent results are obtained. Although here it is important to master the subtleties and nuances of its application, and sometimes unexpected possibilities.
And, of course, the most important thing is the result. After all the effort, nothing beats the pleasure of trying a jar of your favorite jam or compote on a winter evening, which has retained the memories of a sunny summer.
In summer and autumn we are in full swing preparing supplies for the winter and there is a lot of work! But in winter, a jar of jam or pickles will remind us of the sultry summer and delight us with its taste! I offer a quick microwave recipe. This will take a little time; preparation for action takes longer. The markets are not yet empty and you can find ripe and aromatic vegetables on the shelves. We buy tomatoes and go to the kitchen to can them in the microwave for the winter.
Ingredients:
- For canned tomatoes we need our favorite spices - I have 2 buds of cloves, a bay leaf, 6-8 peas of allspice and black pepper, 1 teaspoon of coriander, 2 - 3 cloves of garlic, a small rosette of dill. If you don't like something, don't put it in. If desired, you can add a small piece of hot pepper. It would be nice to add a cherry and blackcurrant leaf, but I didn’t have any!
- You also need the tomatoes themselves, as many as will fit in the jar.
- Salt - 1.5 teaspoons, sugar - 1 teaspoon and vinegar essence - 0.5 teaspoon.
- Product costs are given for one liter jar. I have 0.9 liter jars with screw caps, so I put a little less salt and sugar, but this is a matter of taste.
How to can tomatoes in the microwave:
1. Prepare food and spices. Take small, ripe and firm tomatoes, wash them and pierce them with a toothpick from the side of the stalk.
2. Place spices (peppercorns, coriander, chopped garlic, dill and bay leaf) into a clean jar.
 3. Place the tomatoes tightly. Sprinkle measured salt and sugar on top of the tomatoes.
 4. Boil water and immediately pour it into a jar of vegetables. Be careful with boiling water!
 5. Cover with a lid and place in the microwave for 5 minutes at full power, mine is 800 W. Many people will ask, how does an iron lid behave in a microwave? I answer!
Now they sell lids with different designs, painted, and that’s what we need! They do not spark and are perfectly suitable for the microwave oven.
For those who are afraid to do this, place the jar without a lid in the microwave oven, and simply sterilize the lid in water on the stove.
 6. Take out the tomatoes, pour in the vinegar essence and immediately screw on the lid. Turn over onto the lid and leave until cool.
7. Canned ones are ready! Really fast?
 I’ve been cooking this way for several years now, the recipe has been tested, the jars are great in the pantry in the apartment. Of course, I prepare vegetables in the classic way, but sometimes I don’t have enough time, there are too many vegetables, or my mother’s laziness takes over - that’s where this express method comes to the rescue!
Good luck with your preparations!!!

Microwave oven Panasonic. Total power 800 W.